
How can you add homepage section in brodox?
Adding a product section to your Brodox homepage lets you showcase selected products directly, making them easily visible to visitors and enhancing engagement.
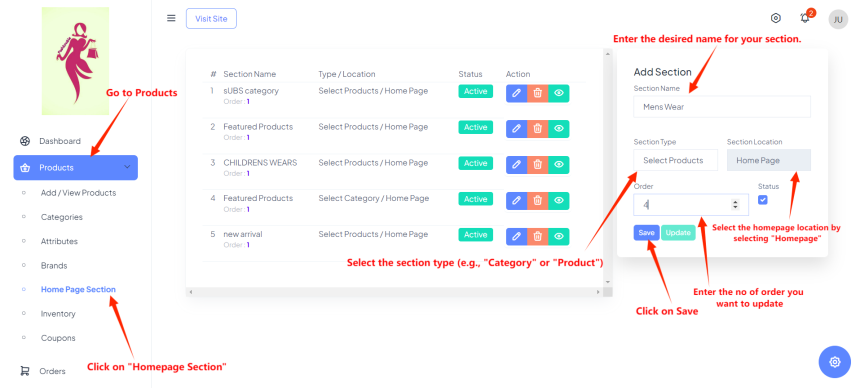
Step 1: Go to Products, click on homepage section. At the right side there you can see add section (section name, type, location and order) and click on save.
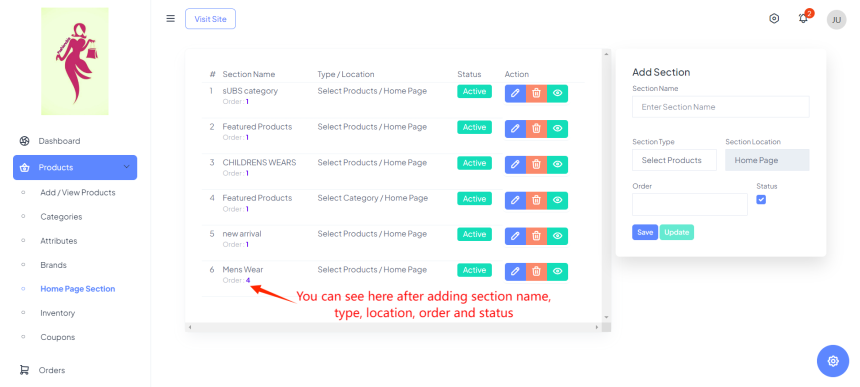
Step 2: You can see in the images after adding section, name, type , location, order and status.
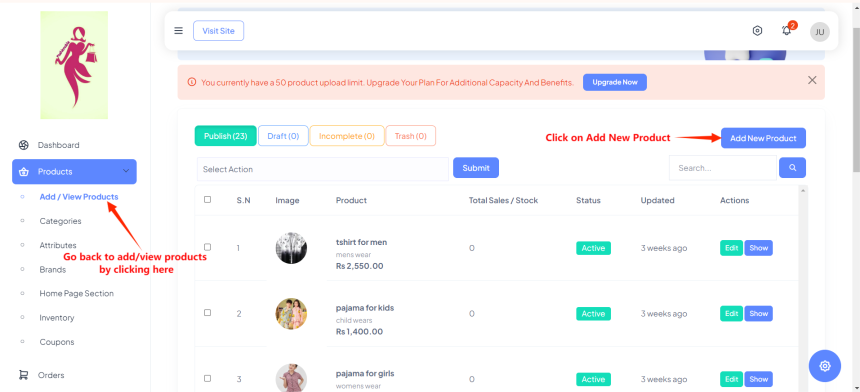
Step 3: Now go back to add view/ products by clicking there. After that click on Add New Product.
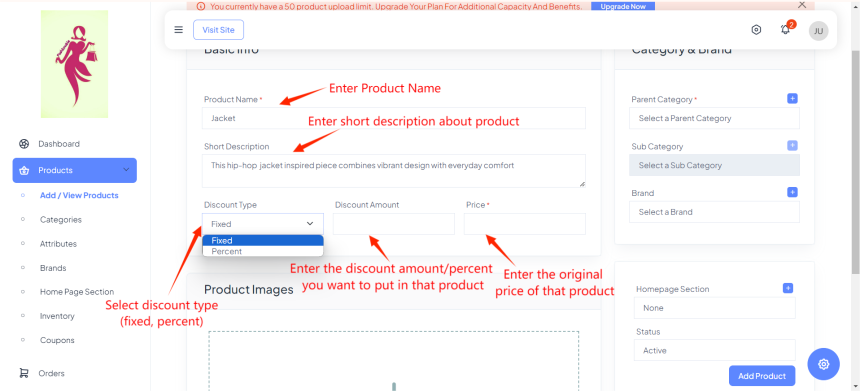
Step 4: Enter product name, short description, discount type(fixed, percent), discount amount/ percent and the original price of that product.
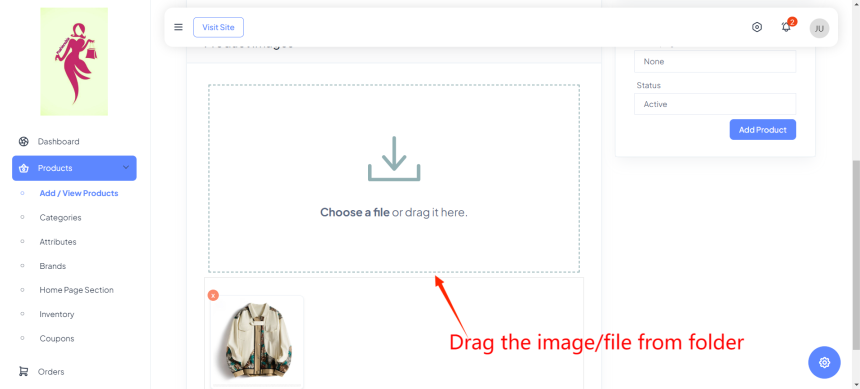
Step 5: Drag the image/ file from folder.
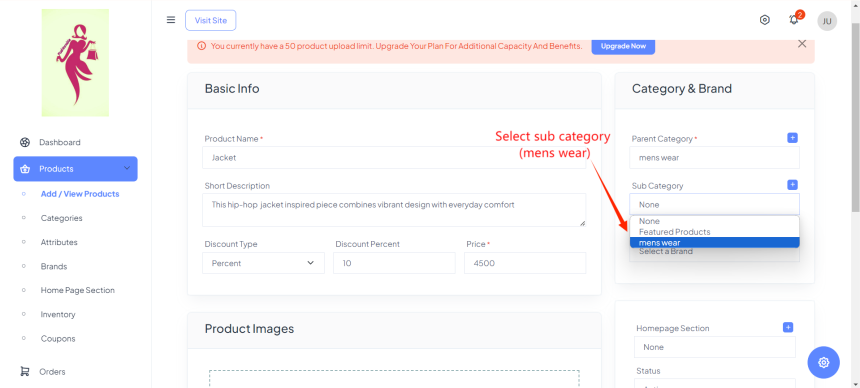
Step 6: Select the parent category where you want to place that product. For example, I have added in mens wear.
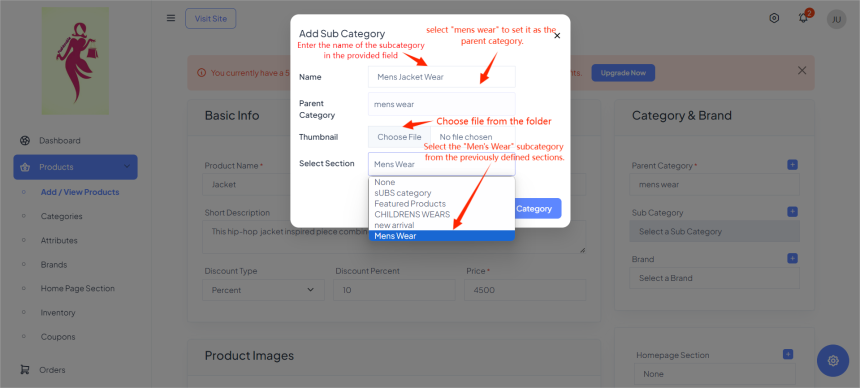
Step 7: Click on add sub category where you have to fill up the name, selecting parent category, choose the thumbnail, and at last select the sub category section (i.e Mens Wear). After adding it, select it.
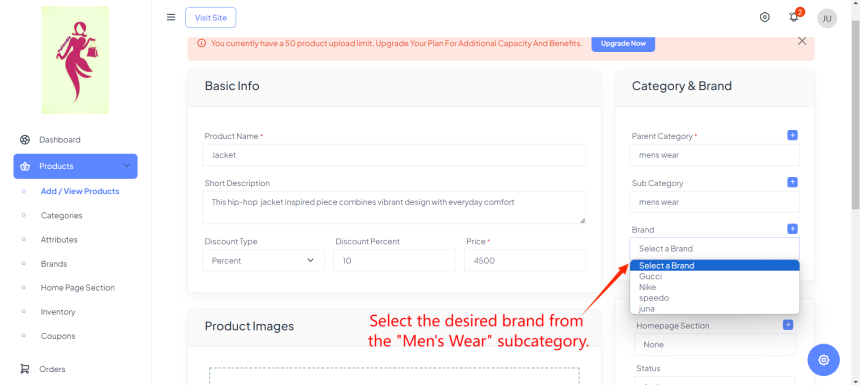
Step 8: Select the desired brand from the "Mens Wear" subcategory.
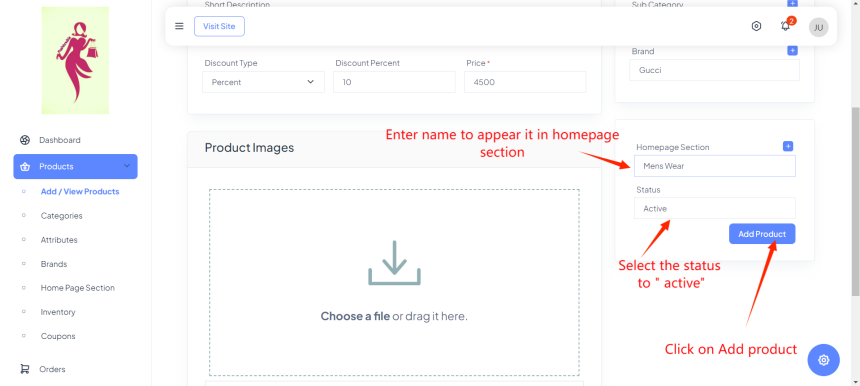
Step 9: Enter and add name to appear it in homepage section, select the status and click on add product.
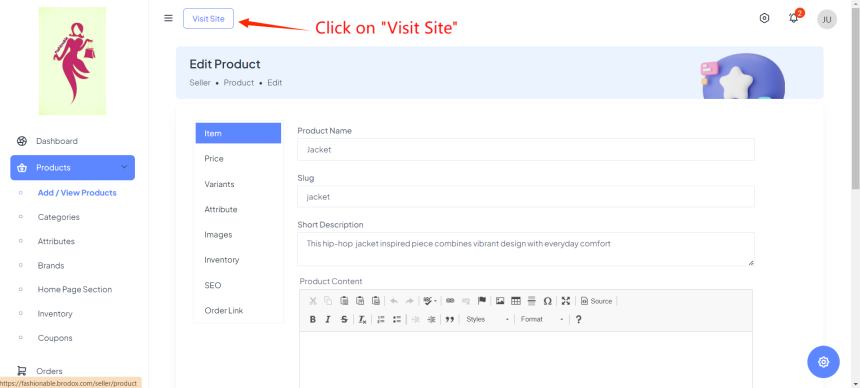
Step 10: Click on "Visit Site"
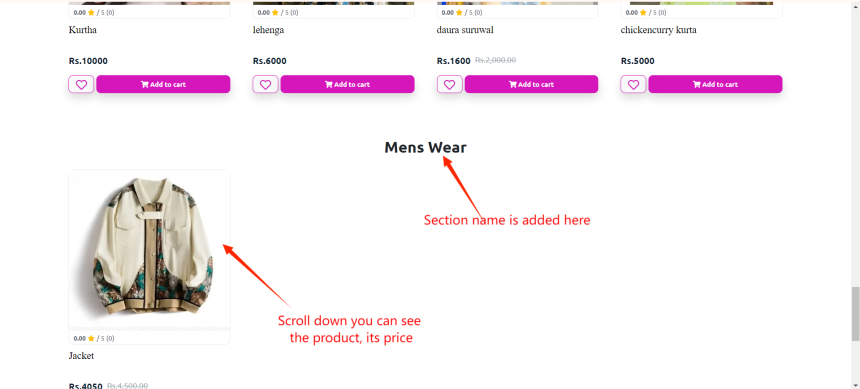
Step 11: Scroll down where you can see the product on the homepage section
To find out more about Brodox, check out our website at blog.brodox.com. There, you'll discover lots of info about what we do and the latest happenings. We'd love for you to explore and learn more about Brodox on our blog. Thank you for visiting!


